Why?
Imagine you're running a SaaS business which serves it's purpose through API: it can sell the currency exchange rates(like https://exchangeratesapi.io/), weather data(like https://openweathermap.org/api), offer payments(Stripe) or authentication/authorization(Auth0) services. In order to run such enterprise well, you need to to solve several problems like access control, load balancing, centralized API management, etc. This is what we tackle in this article.
Table of Contents
- Introduction to APIs
- Common Issues in API Management
- API Gateways: The Solution
- Access Control Mechanisms
- Load Handling and Rate Limiting
- Scaling and Load Balancing
- API Versioning and Routing
- Managing Large API Surfaces
- Custom Authorizers
- Conclusion
Introduction to APIs
APIs are the way how you provide your services and data to your customers, how you bill them and basically do business.

Common Issues in API Management
As APIs grow and mature, managing them becomes increasingly complex. Some common challenges include:
- Access Control: Ensuring only authorized users or systems can access the API.
- Load Handling: Managing high traffic volumes and ensuring API reliability.
- API Management: Handling versioning, routing, and lifecycle management.
- Monitoring, Billing, and Analytics: Tracking usage, billing clients, and analyzing performance.
API Gateways: The Solution
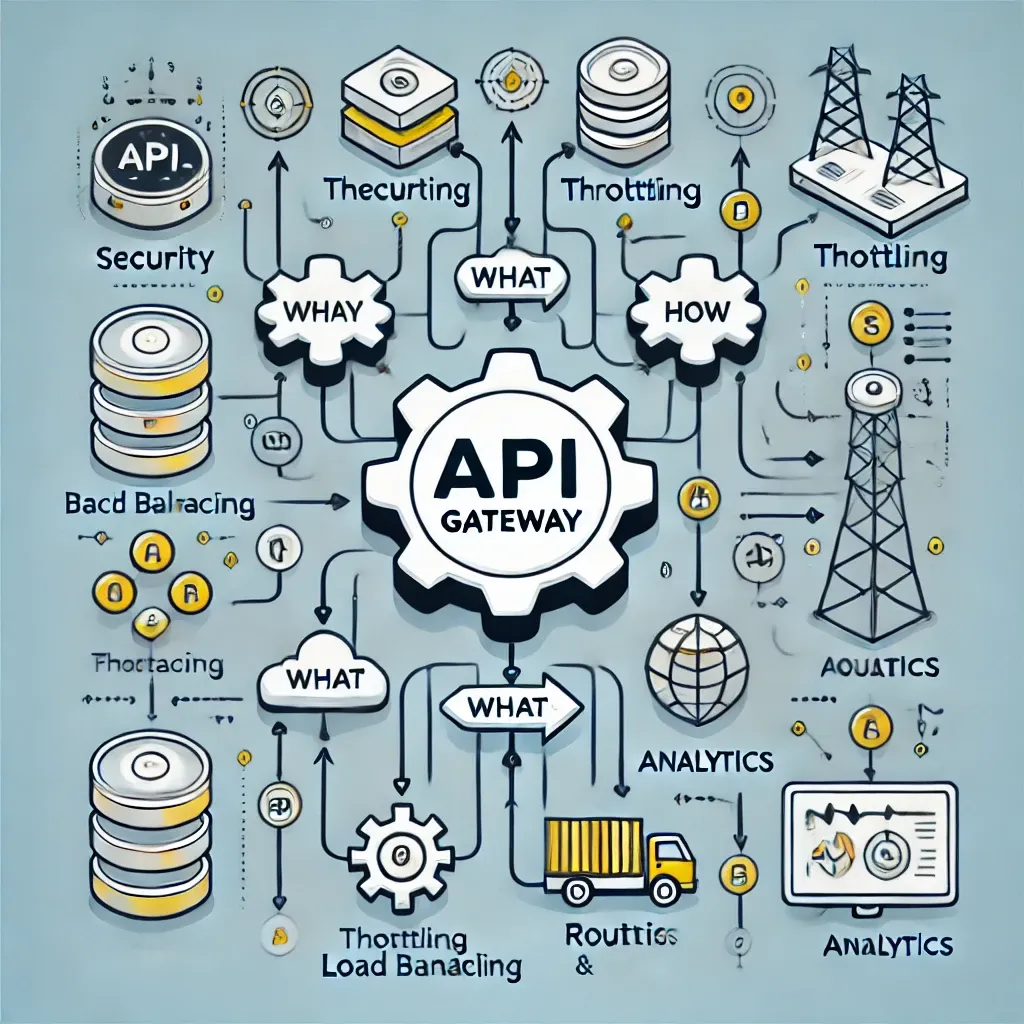
An API gateway acts as a single entry point for all client requests to your APIs. It simplifies the API management process by handling various tasks such as request routing, protocol translation, and security.
Popular API gateway solutions include:
- Cloud-Based Gateways: AWS API Gateway, Azure API Management, Google Cloud Endpoints, Apigee(owned by Google as well)
- Open-Source Solutions: Kong, Nginx, Express Gateway, Traefik, HAProxy, Envoy Proxy.

Access Control Mechanisms
If you don't secure your API, you will end up with the cloud bill bigger than Everest. Better two avoid that with authentication and rate limiting.
Two common authentication methods are:
Basic Authentication
Basic Auth involves encoding the username and password in Base64 and sending it in the request header.
curl --request GET \
  --url 'https://api.example.com/data' \
  --header 'Authorization: Basic {base64(username:password)}'
Don't ever do that. Not in 2024. Forget about it, stop doing it. Just stop. One developer once used a basic authorization and said, "This should keep the bad guys out." The bad guys sent a thank-you note.
Token-Based Authentication
Token-based authentication uses tokens instead of credentials for API access, enhancing security.
curl --request GET \
  --url 'https://api.example.com/data' \
  --header 'Authorization: Bearer YOUR_TOKEN'
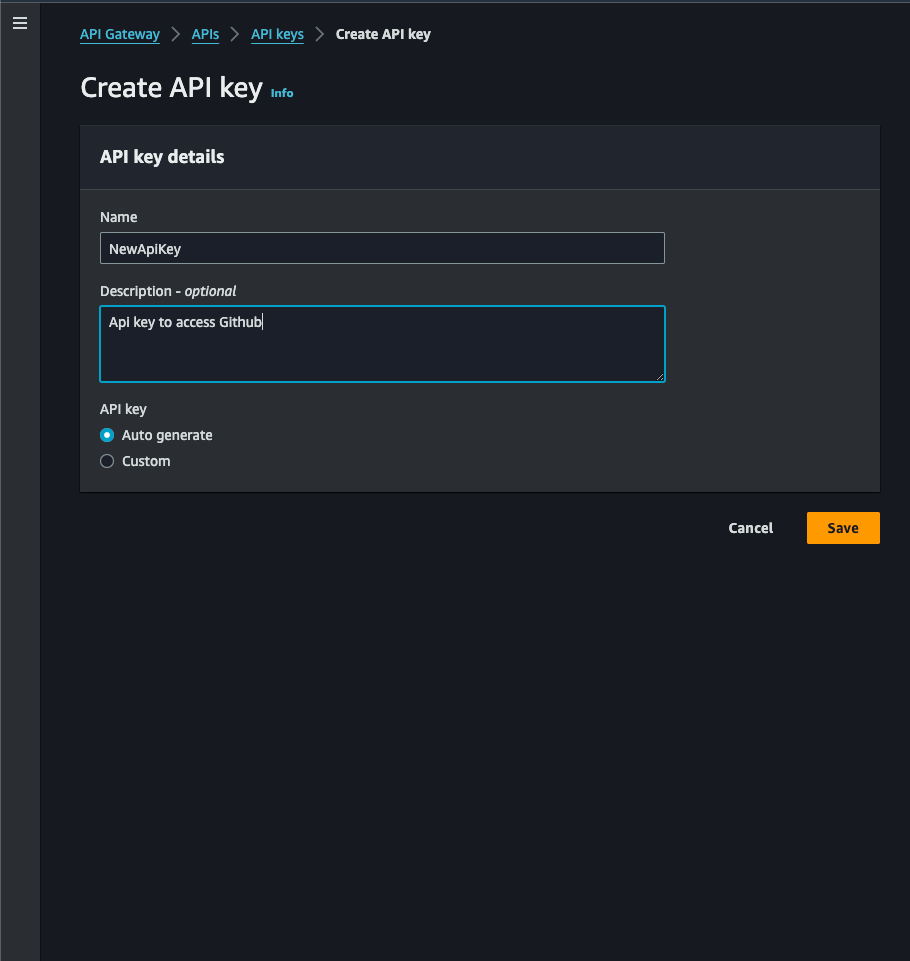
Creating a Token with AWS API Gateway:
- Navigate to your API gateway's dashboard.
- Create a new API key or token.
- Associate the token with specific APIs and usage plans.
Best Practices:
- Separate Tokens: Generate individual tokens for different clients.
- Secure Storage: Instruct clients to store tokens securely.
- Revocation and Rotation: Regularly rotate tokens and revoke them if compromised.
Load Handling and Rate Limiting
As your API gains popularity, it must handle increased traffic without compromising performance.
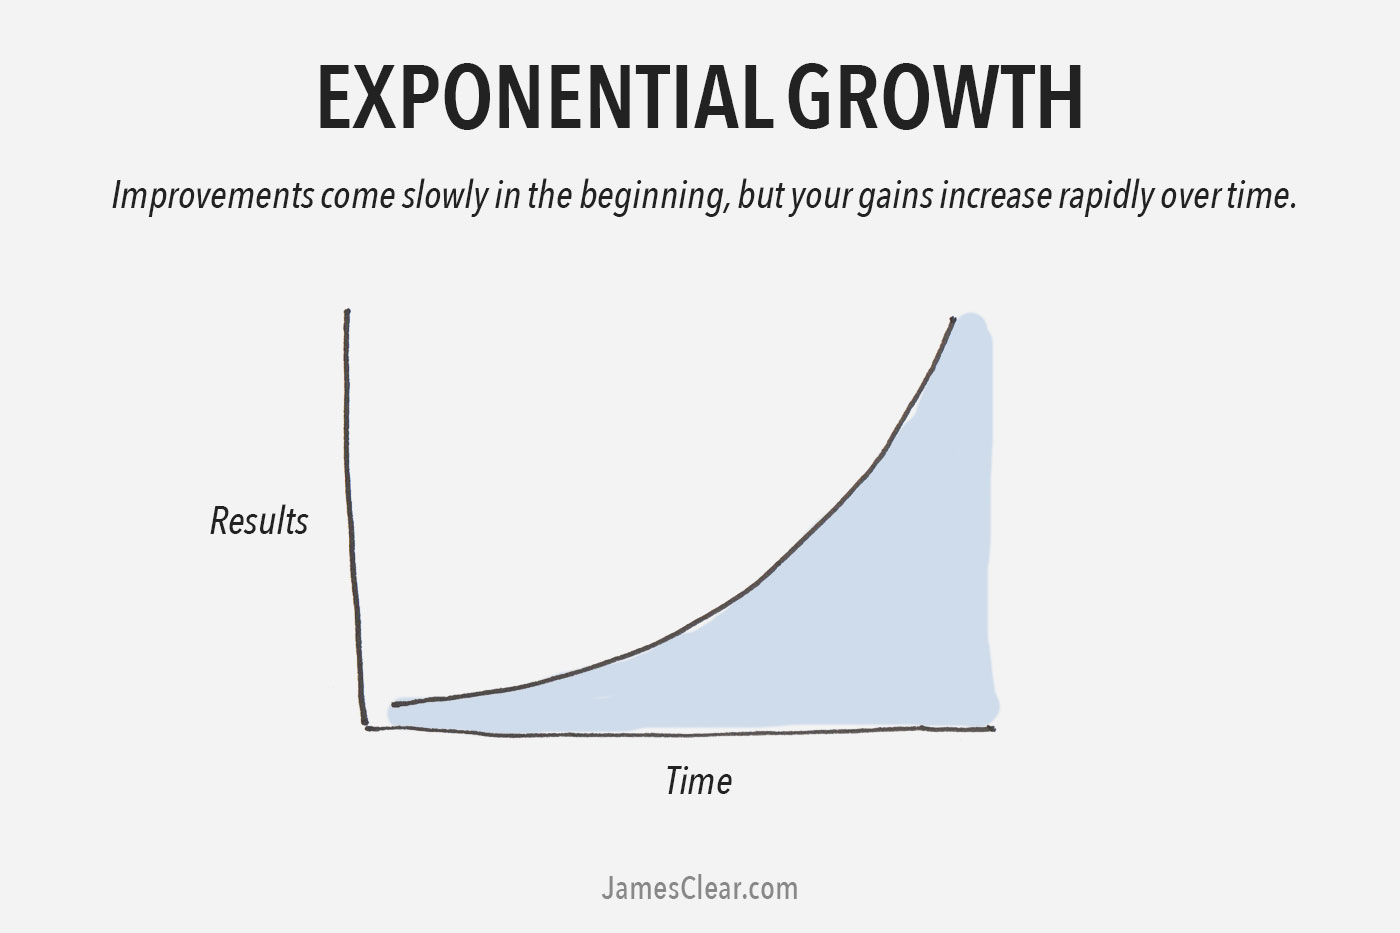
Some bad actors can also overuse your API, or it can be overused by a honest mistake. Anyway, we need to apply some measures.

Rate Limiting Algorithms
Rate limiting controls the number of requests a client can make in a given time frame. Common algorithms include:
- Token Bucket: Tokens are added to a bucket at a fixed rate. Each request consumes a token.
- Leaky Bucket: Processes requests at a constant rate, smoothing out bursts.
- Fixed Window Counter: Counts requests in fixed time windows.
- Sliding Log: Logs each request timestamp, allowing flexible rate limiting.
- Sliding Window: A hybrid of fixed window and sliding log, offering balanced performance.
Token Bucket Algorithm
In the Token Bucket algorithm:
- Each request consumes a token.
- If no tokens are available, the request is rejected.
- Tokens replenish at a predefined rate.
Implementation Example:
class TokenBucket {
  constructor(capacity, refillRate) {
    this.capacity = capacity;
    this.tokens = capacity;
    this.refillRate = refillRate;
    this.lastRefillTimestamp = Date.now();
  }

  refill() {
    const now = Date.now();
    const elapsedTime = (now - this.lastRefillTimestamp) / 1000;
    const refillAmount = elapsedTime * this.refillRate;
    this.tokens = Math.min(this.capacity, this.tokens + refillAmount);
    this.lastRefillTimestamp = now;
  }

  tryConsume(tokensToConsume) {
    this.refill();
    if (this.tokens >= tokensToConsume) {
      this.tokens -= tokensToConsume;
      return true; // Request is allowed
    }
    return false; // Request is throttled
  }
}
Implementing Usage Plans
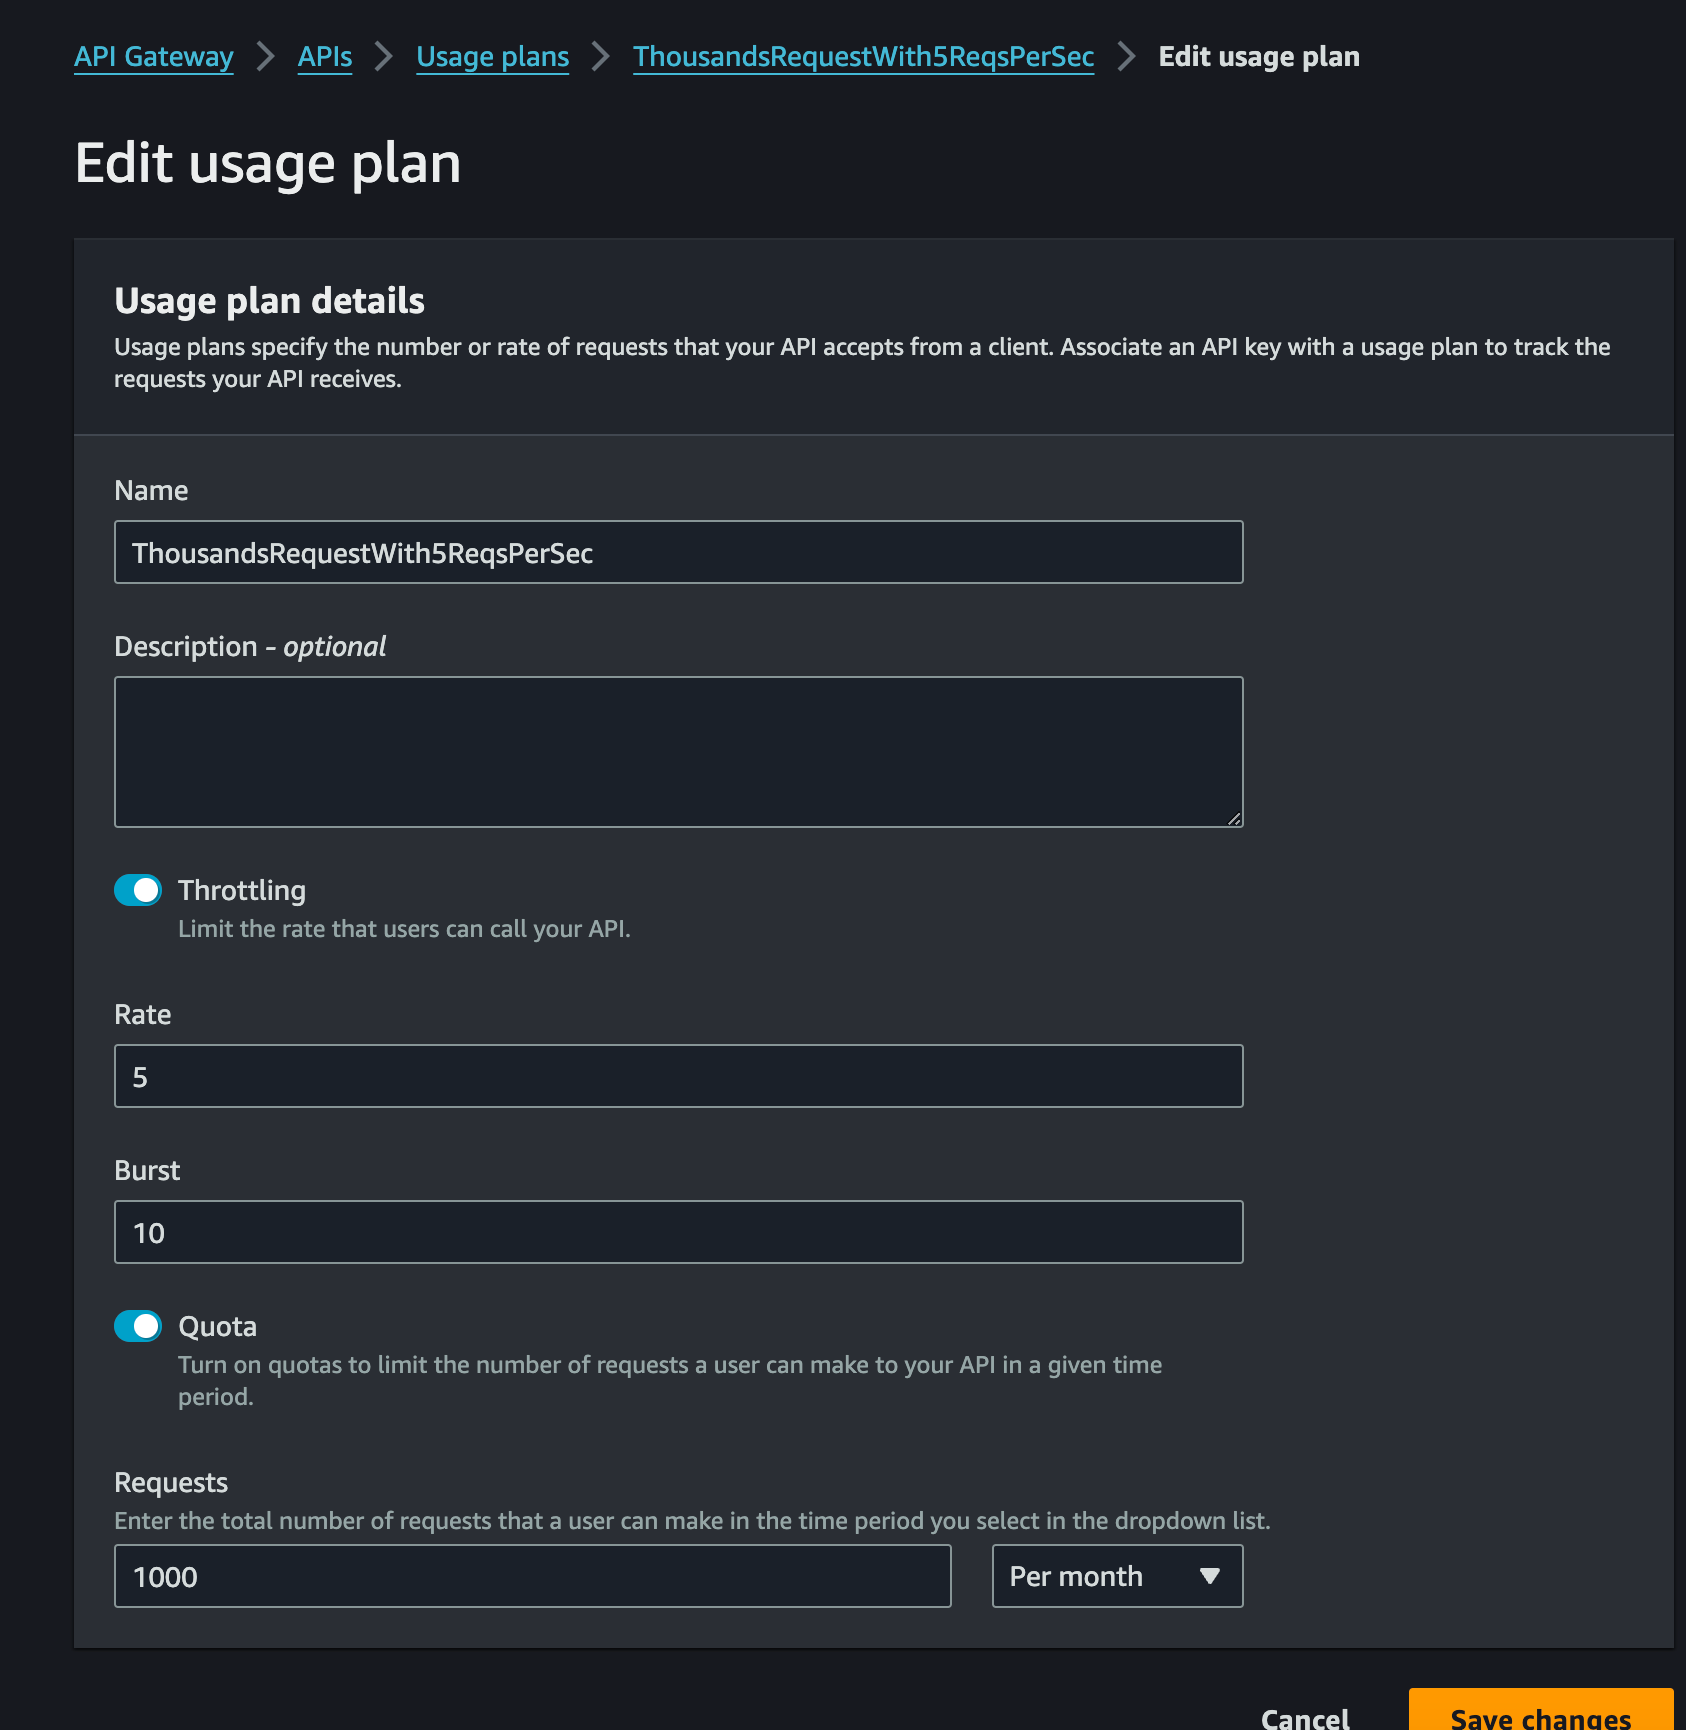
Usage plans in API gateways help manage and monetize API access:
- Create a Usage Plan: Define throttling limits and quotas.
- Associate API Keys: Link API keys to the usage plan.
Assign APIs and Stages: Specify which APIs the plan applies to.
Scaling and Load Balancing
When rate limiting isn't enough to handle high traffic, scaling your backend services becomes necessary.
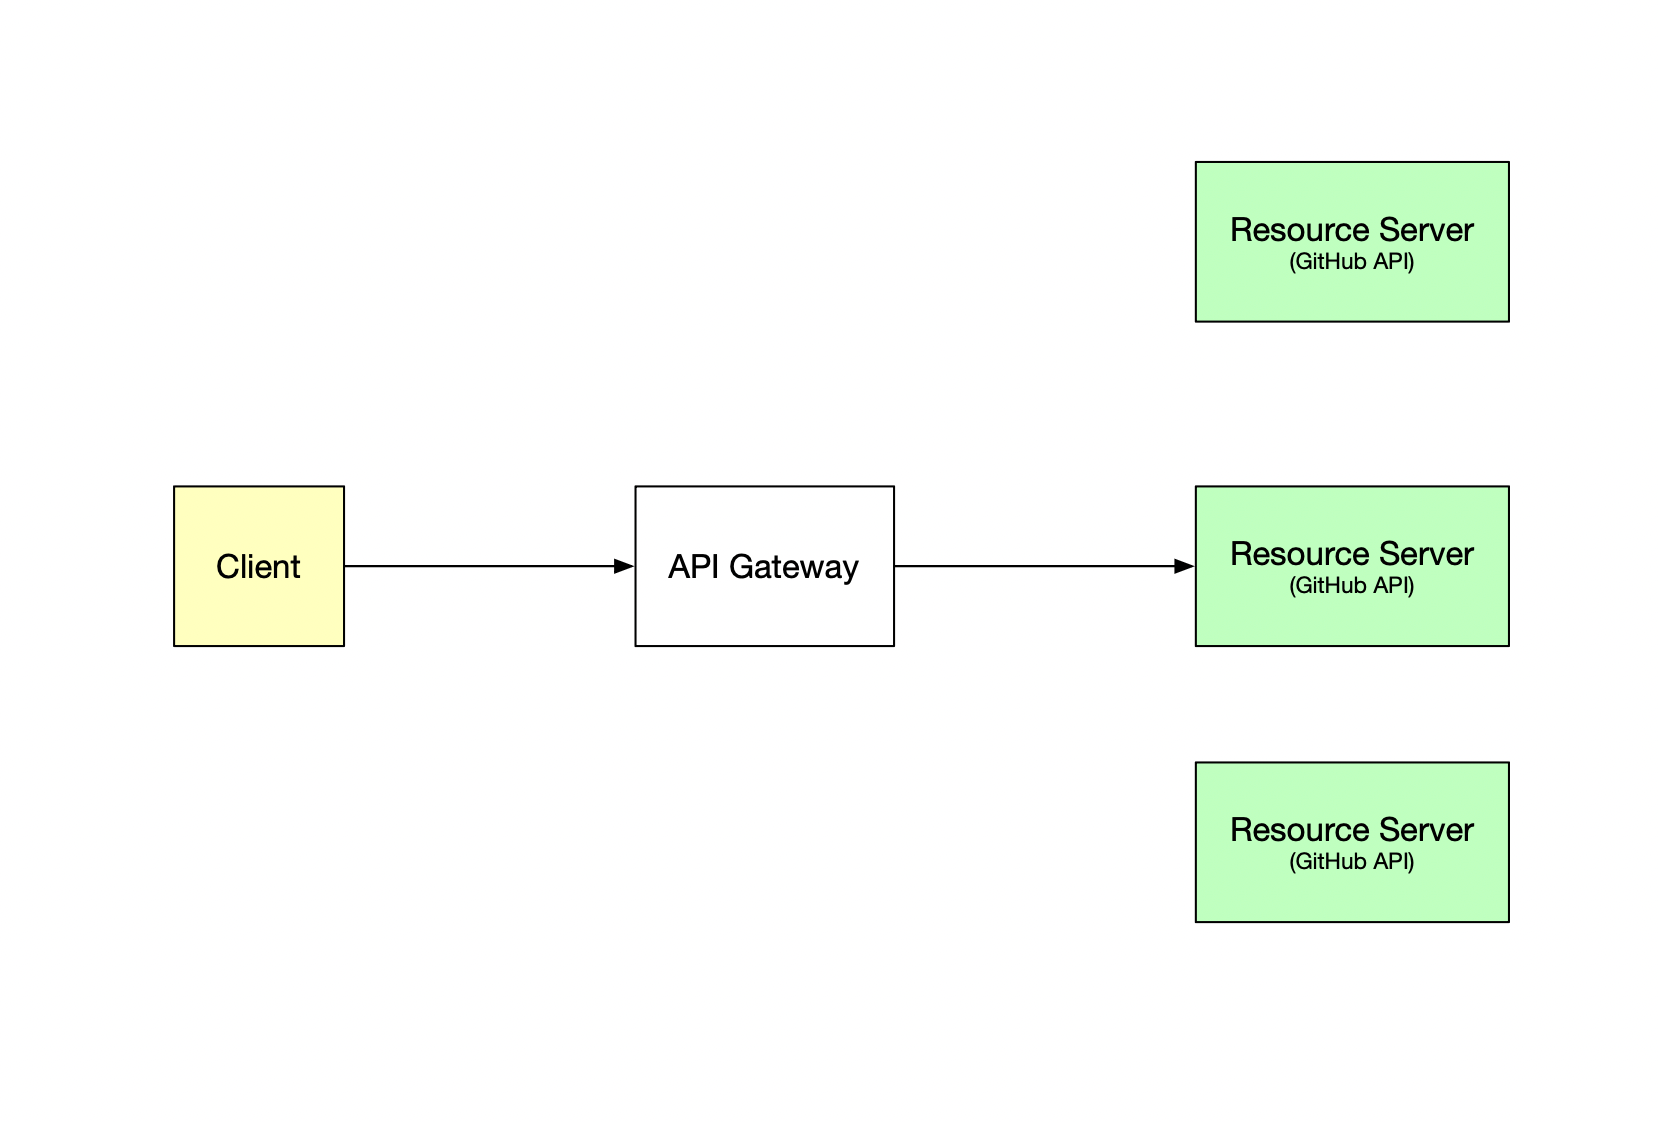
However, with more replicase you need something which will allocate the load across replicas.
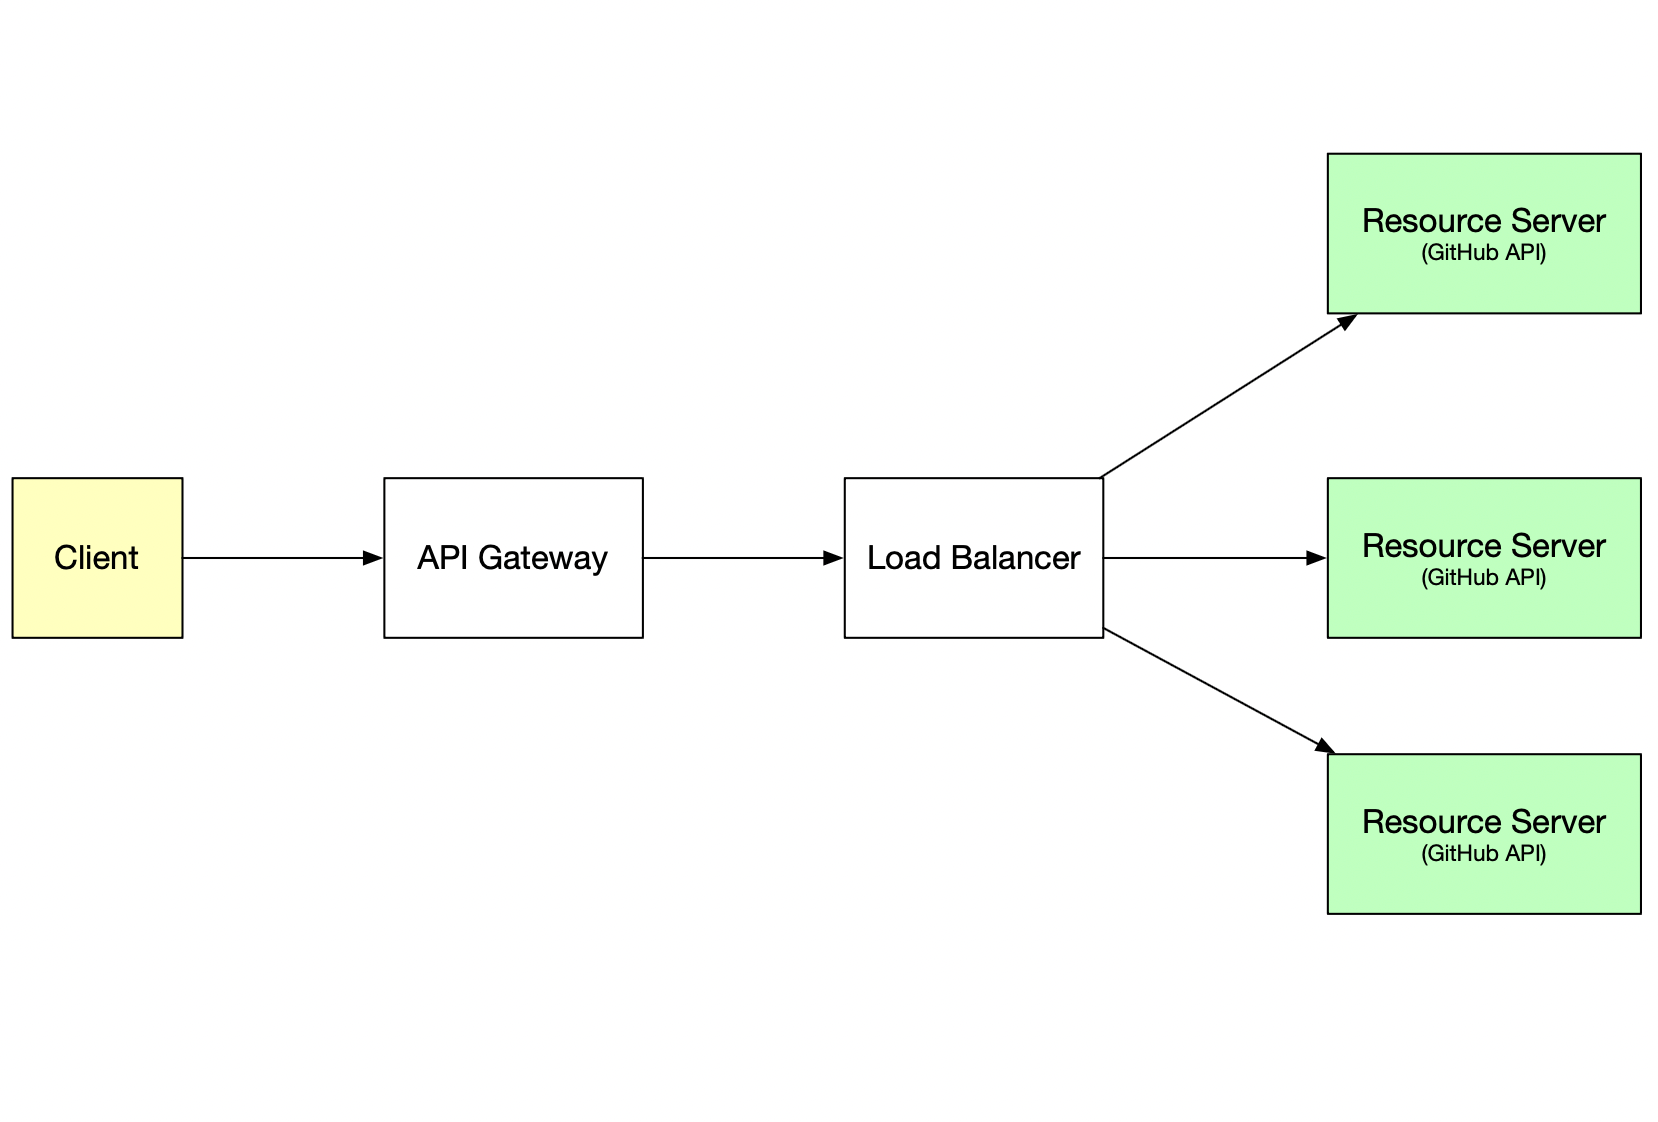
Load Balancing Algorithms
Load balancers distribute incoming traffic across multiple servers:
- Round Robin: Sequentially forwards requests to each server.
- Least Connections: Chooses the server with the fewest active connections.
- IP Hash: Routes requests based on the client's IP address.
- Weighted Round Robin: Assigns more traffic to servers with higher capacity.
- Least Response Time: Selects the server with the lowest response time.
- Geographic Targeting: Directs traffic based on the client's geographic location.
Configuring Nginx as a Load Balancer
Nginx can be set up as a load balancer using the following configuration:
http {
  upstream backend_servers {
    server server1.example.com;
    server server2.example.com;
    server server3.example.com;
    least_conn; # Load balancing method
  }

  server {
    listen 80;
    location / {
      proxy_pass http://backend_servers;
    }
  }
}
This configuration distributes incoming requests to the listed servers using the least connections method.
API Versioning and Routing
As APIs evolve, managing changes without disrupting existing clients is crucial. API versioning and proper routing ensure backward compatibility and smooth transitions.
API Versioning Strategies
Versioning allows you to introduce changes without breaking existing integrations. Common strategies include:
- URI Versioning: Embed the version number in the URL path.
- Example:
https://api.example.com/v1/users
- Example:
- Query Parameter Versioning: Specify the version as a query parameter.
- Example:
https://api.example.com/users?version=1
- Example:
- Header Versioning: Use custom headers to indicate the API version.
- Example:
X-API-Version: 1
- Example:
- Content Negotiation: Utilize the
Acceptheader to specify the version.- Example:
Accept: application/vnd.example.v1+json
- Example:
Best Practices:
- Consistency: Choose a versioning strategy and apply it consistently across all APIs.
- Deprecation Notices: Inform clients in advance about deprecated versions.
- Documentation: Maintain clear documentation for each API version.
Routing Requests
Routing directs incoming API requests to the appropriate backend services or versions.
Implementing Routing in API Gateways:
- Mapping Paths: Configure the gateway to map specific URL paths to backend endpoints.
- Conditional Routing: Route requests based on headers, parameters, or other request attributes.
- Canary Releases: Gradually roll out new versions to a subset of users.
Example of Conditional Routing with AWS API Gateway:
- Stage Variables: Use stage variables to manage different environments (dev, test, prod).
- Lambda Function Aliases: Route to different Lambda function versions using aliases.
Nginx Routing Configuration Example:
http {
  server {
    listen 80;

    location /v1/ {
      proxy_pass http://backend_v1;
    }

    location /v2/ {
      proxy_pass http://backend_v2;
    }
  }

  upstream backend_v1 {
    server v1.server.example.com;
  }

  upstream backend_v2 {
    server v2.server.example.com;
  }
}
Managing Large API Surfaces
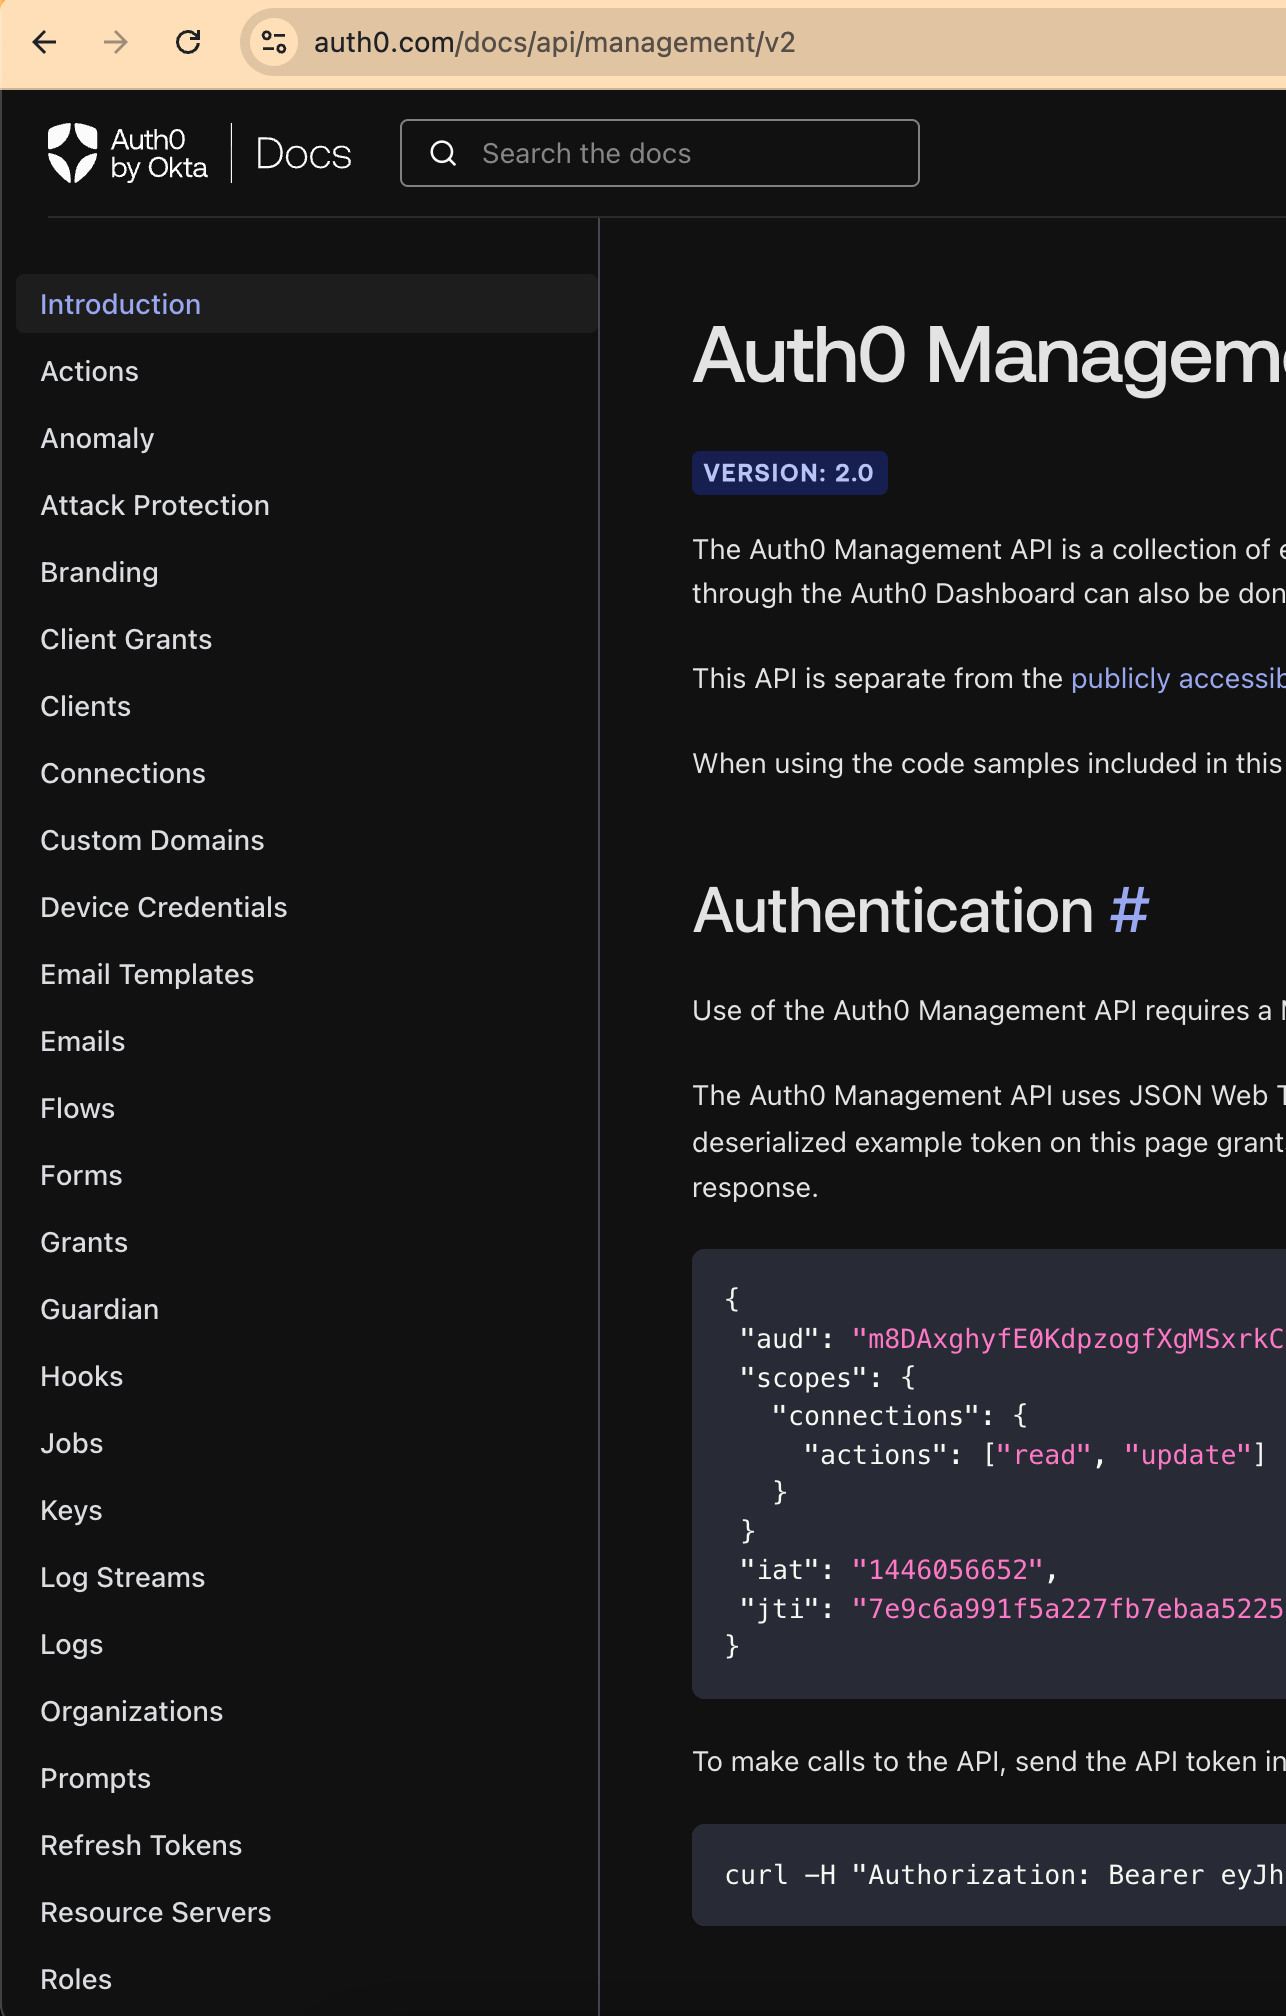
As APIs grow in functionality, organizing and securing them becomes more complex. See an example of auth0: the API can manage emails, flows, keys, logs, tokens, roles and many more! In order to provide granular access to parts of the API, scopes are required.
Defining Scopes
Scopes allow you to partition your API into distinct functional areas (e.g., users, reviews, repositories). By assigning scopes to tokens, you can control which parts of the API a client can access.
Implementing Scopes with OAuth 2.0:
- Define Scopes: List all the scopes representing different API functionalities.
- Assign Scopes to Tokens: When issuing tokens, include the allowed scopes.
- Validate Scopes: On each request, validate that the token includes the required scope for the requested resource.
Machine-to-Machine Authentication
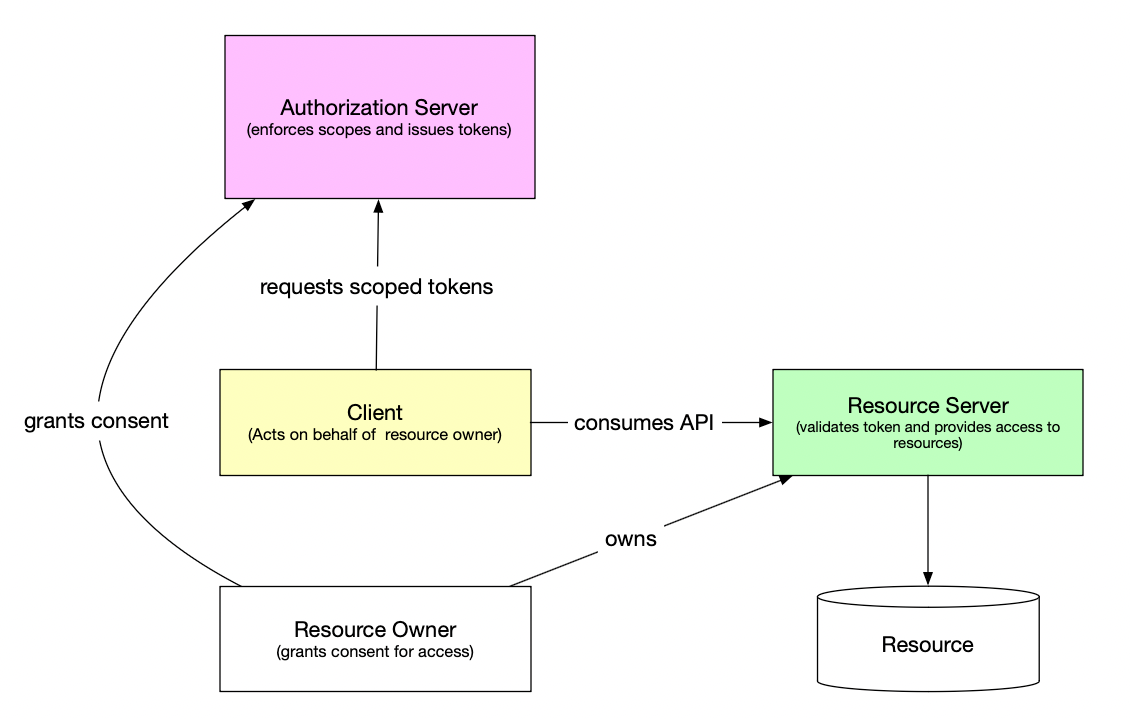
For systems communicating without human intervention, Machine-to-Machine (M2M) authentication is essential.
OAuth 2.0 Client Credentials Flow
The Client Credentials Grant Type is designed for M2M authentication.
Flow Steps:
- Client Authentication: The client authenticates with the authorization server using its client ID and secret.
- Access Token Retrieval: The authorization server issues an access token.
- API Request: The client uses the token to access the resource server.
- Token Validation: The resource server validates the token before providing access.
Custom Authorizers
Custom authorizers add an extra layer of security by allowing you to control access using custom logic.
Lambda Authorizers
Lambda functions can be used to implement custom authentication schemes:
- Request-Based: Validates incoming requests based on headers, paths, or query parameters.
- Token-Based: Validates tokens like JWTs or OAuth tokens.
Example:
exports.handler = async (event) => {
  const token = event.authorizationToken;
  // Validate the token
  if (validateToken(token)) {
    return generatePolicy('user', 'Allow', event.methodArn);
  } else {
    return generatePolicy('user', 'Deny', event.methodArn);
  }
};

function validateToken(token) {
  // Implement token validation logic
  return token === 'valid-token';
}

function generatePolicy(principalId, effect, resource) {
  return {
    principalId,
    policyDocument: {
      Version: '2012-10-17',
      Statement: [{
        Action: 'execute-api:Invoke',
        Effect: effect,
        Resource: resource,
      }],
    },
  };
}
Amazon Cognito
Amazon Cognito provides user sign-up, sign-in, and access control, making it easier to manage authentication.
- User Pools: Manage user directories and profiles.
- Identity Pools: Provide temporary AWS credentials for accessing AWS services.

Benefits:
- Scalability: Handles millions of users.
- Security: Supports multi-factor authentication and encryption.
- Integration: Easily integrates with social identity providers.
What is not covered?
The API gateway topic is pretty huge. I didn't cover some advanced topics here though:
- Common Error Handling
- Retry strategies & Exponential Backoff
- Advanced Security(WAF, etc.)
- Caching
- Deployment Strategies
- Multiregion deployments
- Overage policies
- Cost optimisations
- And some more
However, if you would like to support my work, feel free to subscribe on Patreon!
Conclusion
API gateways are essential tools for managing modern APIs effectively. They address critical challenges like access control, load handling, versioning, and routing. By implementing proper authentication mechanisms, rate limiting, and load balancing, you can ensure your APIs are secure, reliable, and performant.
Leveraging solutions like custom authorizers and Amazon Cognito further enhances your ability to manage authentication and authorization. As APIs continue to be integral to software development, understanding and utilizing API gateways will remain a key competency for developers and organizations alike.
Looking to advance your system design skills further? I've got a Business Oriented System Design Course to help you! The Cohort #3 is running now, so you can sign up for the next one starting January. Follow this page: https://vvsevolodovich.dev/business-oriented-system-design-course/


